Thursday, July 21, 2011

Kids Art Fair

Every year on the Monday night before the start of the Ann Arbor Art Fair, the original Street Fair team puts on the Townie Street Party with live music, food drinks and free hands-on art activities to get the locals in the spirit of the fair. One of the highlights of the Townie Party is the Kids Art Fair. Young artists in grades 1 through 8 from across the county work for months to put together displays and art for the fair. The level of professionalism was incredible this year and I was extremely impressed. I was a bad blogger, forgot my camera and didn't even get the artist's name, but I purchased the above origami piece from a sweet young girl who makes magic with paper.  

This next item is a calendar created by Ella Markley. I met Ella a while back at Blue House where she had seen the 2011 calendar I designed. Her version is so well-executed and thoughtful -- great things are in store for this budding artist!

She got all the details right from the Lollipop Designs name to the themed drawings for each month. My particular favorites are the mailbox overflowing with love letters in February and the two girls -- Ella and her best friend -- watching the fireworks in July.

 
If you didn't make it to this year's Townie Party, don't miss next year to see the next round of Kids art! You're sure to be inspired.

Tuesday, July 19, 2011

Cobblestone Farm

Have you ever been to Cobblestone Farm in Ann Arbor? It's like a heavenly slice of nineteenth century rural life right in the middle of town. I recently did this little drawing of the barn to help promote it as a rental property so if you're looking for a place to host your wedding or big family reunion, check it out!

Monday, July 18, 2011

Crafter Love from Chatty Crafty!

Hello! The boy and I are still in between spaces and shuttling boxes between our apartment and the new place, so my blogging schedule is a bit off — not to mention I haven't cooked a thing in ages! But we're slowly getting there and I hope to be back on track soon with new recipes from a new kitchen and new creative endeavors. In the meantime, a long overdue look at two vendors I was introduced to at Chatty Crafty back in June. The collection of vendors at this show was just stellar. I just loved the booth of Let's Be Friends (above and below).
The creative mastermind behind Let's Be Friends is Felicia and she has such a great eye for creating an environment for her critters. Look at the emotion she manages from that sewed fellow up top — love!

The other booth I swooned over was Ophelia Terrariums. I'm a sucker for the recent explosion of terrarium happiness, but these gals are over the top. There is such detail in each one — a variety of earth layers in different colors, a wide range of plants and plenty of little people and animals and scenes to adore. The images below are all from the super-talented Shashank Shrestha who volunteered his time and energies to take hundreds of remarkable photos at the show.

Thursday, July 14, 2011

Eye Candy over at Blue House

Finca Bellavista, Costa Rica via Adventure Journal

No, that's not my on that zip line headed to my new life, but I am over on the Blue House blog today with another round of Eye Candy. This time we're looking at—no surprise here—cabins! Come on over and play along, why don'tcha?!

Wednesday, July 13, 2011

North Fork Foodie Tour


Once again, it's the North Fork Foodie Tour! Here's a look at the design I did for this year's poster. If you're anywhere near the North Fork of Long Island in September, don't miss this fantastic event!

Thursday, July 07, 2011

Dream houses

Several years ago, before I had moved to Michigan, my good friend BE sent me this photo. This is the house she envisioned for me. A dreamy, dreamy fog layered island home with canoes and trees in abundance. I've kept this photo in my email inbox ever since as an enticing vision of what could be. 

And now, four years later, this is a little glimpse of where the boy and I have landed. If she had told me that back then, I would have scoffed. Who could be so lucky?!

Wednesday, July 06, 2011

Bringing it Home: Art in the Park

At last! A local show. It's been great fun traveling for so many shows this spring, but I miss seeing all my local peeps! Come on out and say hello this weekend in Plymouth where I'll be a vendor at Art in the Park. I was so pleased and honored when they contacted me earlier in the spring to use my drawing for their posters. This is three full days with hundreds of vendors — hooray! I'll be in booth #801 on the northeast corner of Main Street and Penniman Avenue. You can check out the official guidebook for the show here.

p.s. photos of the house to come soon… promise!

Thursday, June 30, 2011

Magic Margin illustration

Allow me to introduce you to Magic Margin: The Classroom Typewriter Project Blog. I had the pleasure of working with Ryan Adney on a new banner for Magic Margin. Ryan is a high school English teacher in Phoenix using typewriters as a learning tool in his classroom.

The typewriter project, as it says on the blog, "is designed to get children to write without distraction." With about fifteen classic machines in the classroom, Ryan encourages his student to journal using whatever method they choose. 

"As you can guess, there are not too many people who use typewriters in their 21st century classrooms," he says. "I try to keep the technology in my classroom democratic; students can use whatever they want. It just so happens that the typewriter is the best. Well, I think that there is magic to be found being outside what is normally expected for an English classroom." Wow! I think these kids are mighty lucky to have a teacher with such vision. 

Here's a look at a couple of the student typecasts:


As any of you who have visited my booth or table at a craft show may have noticed, I love typewriters and like to incorporate my grandmothers' typewriters into my display. It is always children who are most intrigued by them and I love the way they stare and hesitate. I stare, too! I just love looking at—and drawing—typewriters. Apparently Ryan has a big old Royal HH on his desk in the classroom, so that seemed the obvious choice for the banner.

The blog is very active and I encourage you to check out more of the student typecasts — and to try your hand at a little old-fashioned typing!

Wednesday, June 29, 2011

Nashville's Hatch Show Print

On my recent trip to Chattanooga for Chatty Crafty (more on that soon!), my traveling pals—Courtney Fischer and Laura Berger—and I decided we needed a little taste of Nashville on our trip home. One of the highlights of our stop was visiting Hatch Show Print. Now part of the Country Music Hall of Fame, this letterpress printing shop has been churning out stunning letterpress gig posters and more since 1897. The early years were country music, vaudeville, circus shows and more. Nowadays, everyone from the Beastie Boys and Andrew Bird to Ira Glass and the Trans Siberian Orchestra seek out Hatch for their unique style. You can see a great selection of their more recent posters on gigposters.

The cats of Hatch figure very heavily into some of their designs. We witnessed this little fellow live and in person (in cat?!) mowing down on a little mouse dinner the night before when we walked by the shop after hours.


P.S. Chronicle published a great book about Hatch in 2001. 

Friday, June 24, 2011

Massaged Kale Salad

This is one of those things that I noticed one morning and then seemed to see it everywhere — massaged kale salad. This, of course, means that I had to try it. Basically, you massage sea salt into the kale (preferably dinosaur aka lacinato kale) with your fingertips. This softens the kale and releases its natural moisture and bitterness making it lusciously smooth and tender. This dressing is the perfect pairings of flavors and textures, too, with a nice kick from the ginger and the honey and lemon flavors melding it all together and softening it. I made half a batch for a delicious weekday lunch — mmmm! 


Massaged Kale Salad
Adapted from Eating is Art
Serves 2-4

1 bunch kale
1/2-1 teaspoon sea salt
4 tablespoons honey
4 tablespoons lemon juice (one whole lemon)
1 tablespoon freshly grated ginger
1 apple (cored and sliced)
6 radishes (sliced)
1 avocado
1/2 cup roasted sunflower seeds

Preheat oven to 350ºF. Spread sunflower seeds in a single layer on a rimmed baking sheet and bake for 10 minutes or so. Remove and let cool.

Rinse the kale well and then cut into 1/4 inch wide strips and place in a large bowl. (I prefer to remove the stems, but if you'd like, with the dinosaur kale, it's not really necessary.) Take about a half teaspoon of sea salt and sprinkle it over kale. Then, using your hands, massage and squeeze the kale vigorously, so that the kale softens and moisture begins to sweat out. Taste it to see if you need any more salt, which you probably will. Massage the kale until it’s moist and tender.

Mix together the lemon juice, honey, and ginger. Toss together with the kale. Add the apple, radish, avocado, roasted sunflower seeds and some freshly ground black pepper. Toss again to combine.

Enjoy!

Thursday, June 23, 2011

Put a Bird on It!

Yes, that's right. Put a Bird on It. A handful of birds made their debut on the brand-spanking new Frayed Sew web site this afternoon. I had a great time working on this project with Becky who runs this fantastic little handmade shop in Helena, Montana. I haven't had a chance to visit in person—yet—but the photos show just how charming it must be!To see the birds in their natural habitat, go here now!

And now I'm off to pack the car for my last out-of-town show of the season in Chattanooga for this weekend's Chatty Crafty show. hooray!

Friday, June 17, 2011

Final Taste of Spring: Shaved Asparagus Salad

Depending where you are, asparagus season may be just about coming to a close. It is here and I've been trying to take full advantage and eat my fill — practically daily. In case you've grown sick of it — gasp — here is a nice variation I had not tried before. It's asparagus in the raw and it's the kind of thing that just can't be done with bland grocery store asparagus. No exact measurements are given — it's all just to taste. You really can't go wrong.

Shaved Asparagus Salad with Lemon and Parmesan
From Smitten Kitchen

1/4 cup pine nuts or sliced almonds 1 pound asparagus, rinsed (No need to snap off the tough ends)
1 lemon, halved
Olive oil
Coarse salt
Freshly ground black pepper
1 to 2 ounces Parmesan cheese

Preheat oven to 350ºF. Spread nuts on rimmed baking sheet in single layer  and toast for 5 to 10 minutes. DO set a timer and keep a close eye on things. They turn golden in a flash and then burn in a jiffy. We've all done it!

To shave asparagus, rest a single stalk on a cutting board while holding onto the tough end. Use a vegetable peeler  to shave off thin asparagus ribbons from stalk to tip, peeling away from the tough end in your hand. I'm sure a Y-shaped peeler would make this a breeze, but I used a standard one and it worked just fine. Discard the tough ends once you’re done peeling.

Pile one-third of your ribbons on a medium-sized serving platter. Squeeze some lemon juice over the asparagus, drizzle it with a bit of olive oil and sprinkle it with salt and pepper. Toss gently and then use your peeler to shave curls of Parmesan right off the block, over the asparagus. Sprinkle with some toasted nuts.

Repeat with remaining asparagus, a third of the remaining bundle at a time. Serve immediately.

Thursday, June 16, 2011

Indieana Handicraft Recap

First up: Sunday Afternoon Housewife. I met this clever, clever gal—the other Martha—at last December's Bazaar Bizarre in Cleveland and she was kind enough to play hostess for the weekend. She and her husband Mark live in a gorgeous old house with a menagerie of sweet beasties. Martha makes really fun Scrabble Tile pendants, glass tile pendants and silk screened tees. Her blog is a great source for crafty advice, tips and more.
 
Jess from Paper Acorn was also a guest at Martha's and it was great to have the chance to hang out with this lovely crafter who is a spectacular paper artist. Her display — as are her products — was as refined and beautiful as ever.

Oh my goodness! Aren't these the greatest?! These hand-crafted birds by Carol Davidson aka Davidson Handmade are just magnificent. She does not appear to be online, so all you get are these photos. Sigh…

Last but not least, Detroit's finest were on hand: Perfect Laughter was in the house with their latest in display perfection to showcase their silkscreened beauties. Their name banner was hand stenciled by Dennis — amazing! I am coveting, coveting, coveting their "The Cure for Anything is Salt Water: Sweat, Tears or the Sea" print.

Wednesday, June 15, 2011

The Nomadic Pickle Project

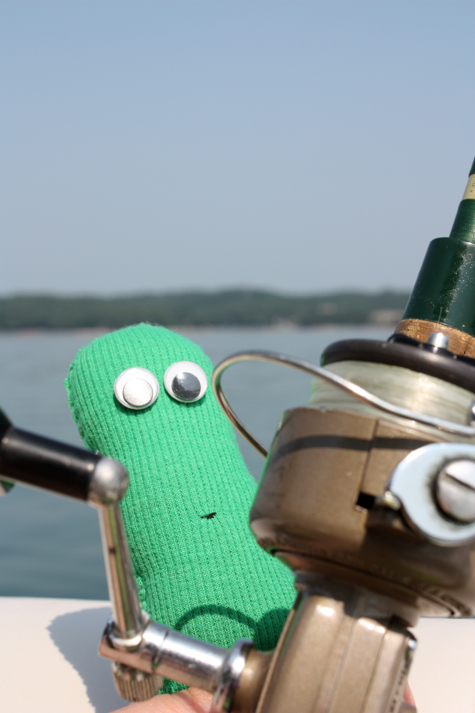
Did you happen to notice the pickle in my post a few days back?  I hinted at him, but didn't want to reveal too much too soon. You see, the pickle blogs and I wanted to give him time to get his posts together. Yep, that's right: A blogging pickle. Now that he's ready… ahem… I'd like to formally introduce Mr. Pickle, aka the Nomadic Pickle. He was born out of crafty genius by Amanda and now travels the land with whomsoever will have him — friends and strangers alike. And then he blogs about it.
I had the pleasure of Mr. P's company two weekends in a row. You can read about his fishing adventures with my family in South Carolina here and follow his crafty journey with me to Indianapolis for the Indieana Handicraft Exchange here.
So how 'bout it? Wanna have a pickle friend along for your next adventure? Mr. Pickle is quite organized and keeps a tight schedule here. Find out how you can participate and sign on to the pickle project here. Hooray for pickles!

Monday, June 13, 2011

Millet Muffins

I recently bought a bundle of millet from the bulk section without any clear plan of what to make. I've been interested in trying a wider variety of grains lately — especially as this beautiful book made the blog rounds. Millet is a new one to me and after making this recipe I plan to experiment with it a lot more.  

The kitchn has a great page about millet. It explains that it is an ancient seed that's a staple for about one-third of the world population today, though here in the U.S. and much of Western Europe it has been demoted to bird and livestock feed. It's extremely nutritious, great for those with gluten allergies and is easily digestible and soothing to the stomach. 

There are many varieties of millet but the kind most often found here is yellow proso, which is what I used for these delicious muffins. I debated between three different recipes. I was particularly keen on trying Heidi Swanson's version, but didn't have enough honey on hand. I liked that the millet was slightly crushed in this version, but was too lazy to take that extra step. And so I landed on this version from the Metropolitan Bakery in Philadelphia. The millet provides a distinct texture and crunch that I just love and the batter has wonderful flavor with a mild sweetness. These are best eaten the day they are made, though slathered with a fresh bit of strawberry jam on the second day is equally worthy. 


Crunchy Millet Muffins
Adapted from Slash/Food

2 cups all-purpose flour 
1 1/4  teaspoons baking powder
3/4 teaspoons kosher salt
1/2 teaspoon baking soda
1 cup millet, lightly toasted and cooled
3 large eggs
1/4 cup milk
1 teaspoons vanilla extract
6 Tablespoons unsalted butter, softened
1 cup firmly packed dark brown sugar

Preheat over to 350º F with rack in middle of oven. Toast the millet by spreading it out on a cookie sheet and baking it for 10-12 minutes. Every three or four minutes, take the pan out and give it a careful shake, to make sure that every kernel of millet gets toasted evenly.

Raise oven temperature to preheat to 375º F. Butter 12 muffin-pan cups or use paper liners.

In a large bowl, sift together the flour, baking powder, salt and baking soda. Stir in millet. In a small bowl, whisk together eggs, milk and vanilla.

In the bowl of a mixer with paddle attachment, beat the butter and brown sugar until well-combined and somewhat fluffy. At low speed, add the flour mixture alternately with the egg mixture, beginning and ending with the flour mixture. Take care not to over mix.

Spoon batter evenly into the prepared muffin-pan cups. Bake 15 to 20 minutes until a wooden skewer comes out clean. Cool for five minutes and then remove from pan and continue to cool on a wire rack.